Showing posts with label Renos. Show all posts

Friday, June 14, 2013

Playroom/office Demo Mode

Also known as the before pictures, or 'oh that's better already'.  Here the first of a very full load of panelling that went off to the dump.  Buh bye!

This is what my hubby does on his days off!

The west wall as looked when we first moved in and used this as our playroom.  
Built in shelves play now you see me now you don't!
...and here we go in demo mode
playroom now...
 More of the west wall with a peek at the funky panelled window sill and valence. Fancy pants.
More befores. See the pink lump on the floor? She's 5 now.
And R watching Grover there? He read The Hobbit, on his own.


Wow did we have a lot of toys.  We just did all the toy editing and sold stuff on craigslist/ gave stuff away.  The books were especially hard to sort through.  And almost all the Little People are gone.  Ah Fisher Price, those were the good old days.  Now its all Barbie and Skylanders. Sigh.
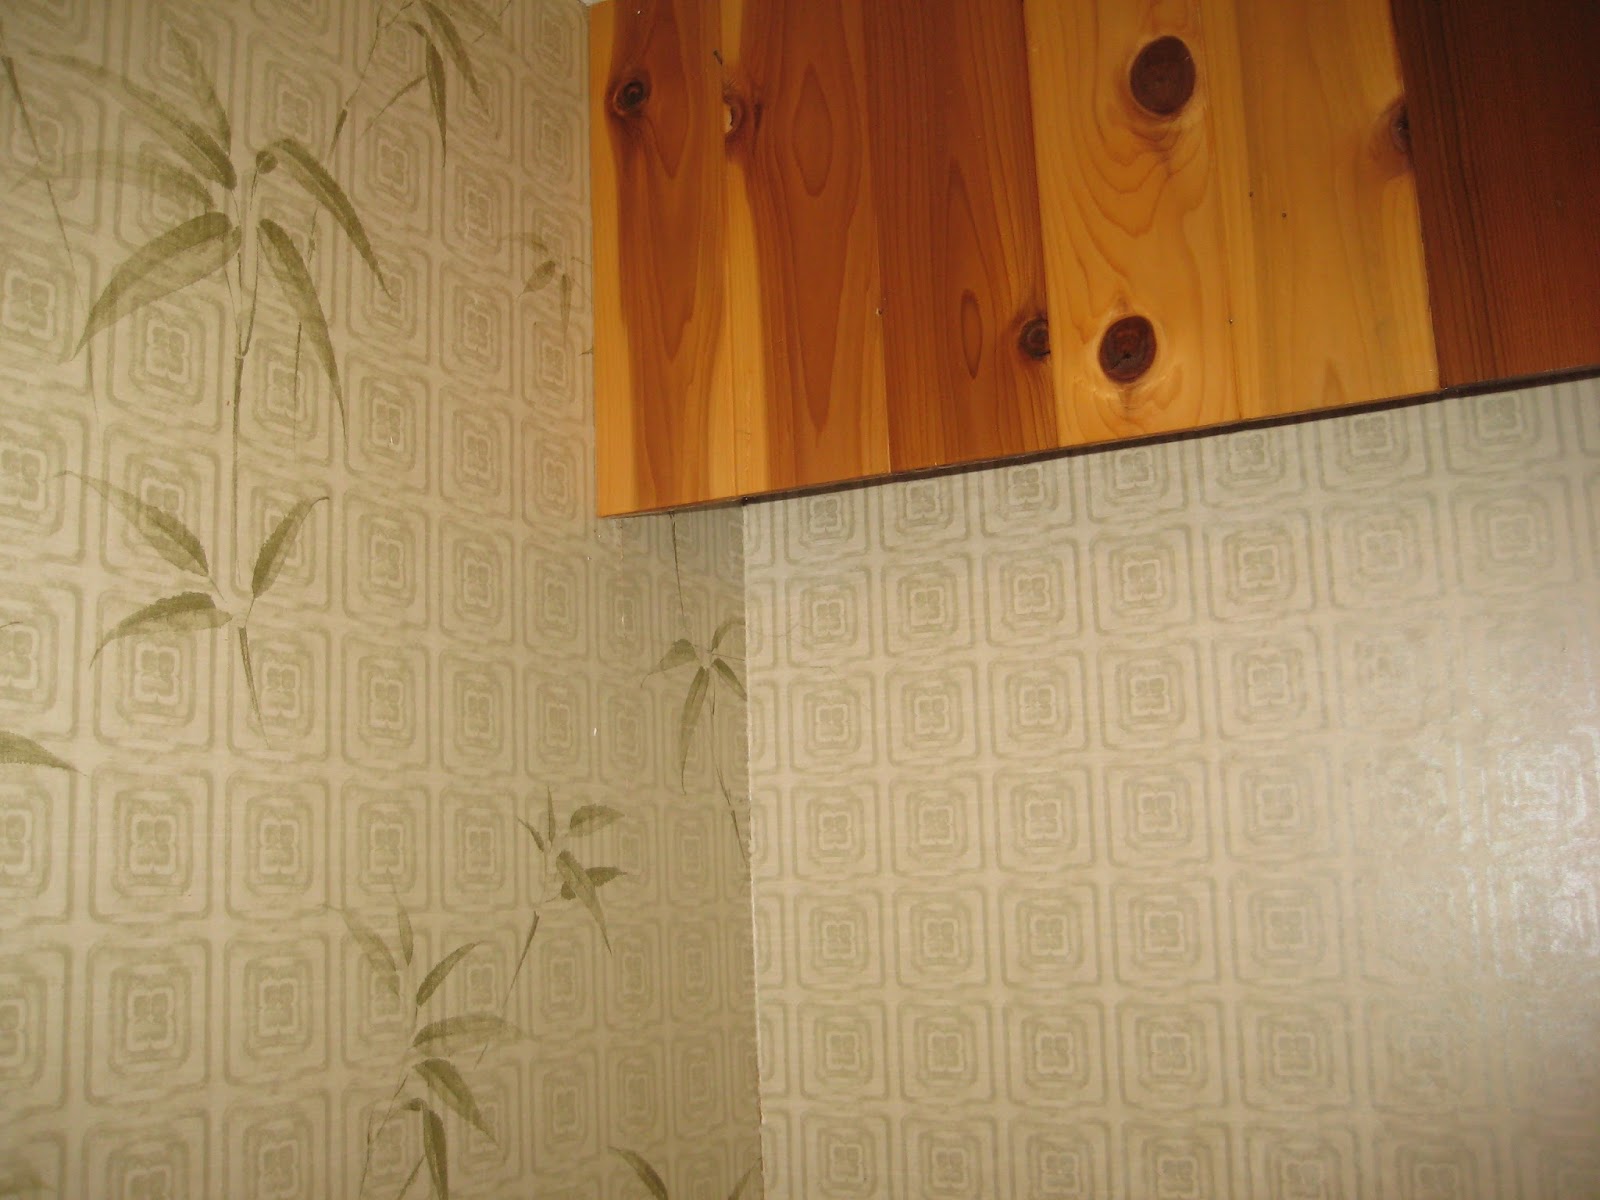

Particularly hideous close up. Panelled valence and
not one but TWO types of shiny bamboo wallpaper.
But they go together so well!

...looks much better stripped to the studs.
North wall with the pink quilt on it...


Can't wait to move forward and start putting things back.  The wall that faces the carport is already reframed.  He needs to do a few electrical and plumbing things that I don't understand or care about.  Apparently I will care if we can't plug anything in the new room or if the main water pipe breaks behind the drywalled ceiling.  I guess it is a good idea for him to do his plumbing/electrical stuff.  But as soon as it's done I expect to move on to pretty things, ok?


Tuesday, April 16, 2013

Pink Closet Sneak Peek

I still have to take some good pictures of the finished product, but here is a sneak peek.


Daddy picked up a can of pink (it was a deal), and my little princess is pleased with the pink and I am pleased it's not the whole room!  What a good little helper she was.  CUTE!

Monday, May 16, 2011

Reno News - Fireplace Details

The fireplace has been up and working for quite some time. The furniture was moved in the family room long ago. We have watched many episodes of Bones or Magic School Bus on the great TV. We even put pictures on the walls.

BUT.... the tile around the fireplace never got done. Yep, it's been cement board with screws showing for months. Since the grey blends nicely with my scheme you may not have noticed. But someone in this house noticed. That would be my reno-gifted husband who has a drive to see things finished. He is great at working at his own pace. He definitely could have been a home schooled child. Unlike me. My mom can attest that were I homeschooled as a child both she and I would both be dead now:^) Ok, tangent over.

C'mon in the basement and see for yourself....
Can you tell? It's kinda darker around the fireplace insert....

There it is....
He picked the tiles (I wanted the same but with less texture). Apparently I am very uncool because all the things I want are never available. Instead I am just going to believe that I am so cool that the Poco tile shop doesn't have the cool things I envision in stock yet, maybe I am ahead of the trends. Yep, I am going with that one. Tangent two now over.

He is painting/cutting the baseboards this week so this room might actually be done soon. For reals. I just need to sew curtains. Remember tangent one? The windows might be bare for a while still:^)


Wednesday, May 4, 2011

Reno News - Finally Hanging Art


I mentioned a while back that the family room was ready for artwork. But, I have continued to stare at the blank walls since then. Monday we took advantage of a rare day off together to avoid 'the almost but not quite done' look.

I took inspiration from this magazine: I got this issue a while ago and love tons of the images. I usually cut up my magazines but this one is on thick paper, a special publication, so I have kept it intact and go to it over and over again. It was this picture of a cabin bedroom that interested me:
See how the pictures are close together and centered on an imaginary line along the wall? Love it. Ok, I love the matching twin beds and burlap pillows too, but that's another story.

Here is what we came up with:

It is (from the left) - framed maps of N. Carolina (where we used to live) from a big map book that had seen better days.
-An etching my Aunt gave to my Dad.
-Two photographs one of my grandpa and his friend and the next of the mountain they climbed.
-A frame we have had since we were married. I was tired of the artwork inside (a postcard) so I printed a vintage botanical from the Graphics Fairy on cardstock and slipped it in the frame. The significance of the ferns? Well, they are everywhere around here thanks to the wet climate and they really say 'west coast' to me.


So remember the BEFORE:
And AFTER:
I actually really like how it all came together! The tones are all brown and green and blue which works great with the rest of the neutral room and the turquoise and green accents. I raided my mom's stash of artwork (and created some of my own meaningful art) so it was a free project- my favorite kind.

And on the back wall another BEFORE:

and an almost AFTER:
Once more raiding my Mom's crawlspace. Two paintings that my Dad painted. The painting on the left is the ocean near my grandparents house in Victoria where we spent many weekends and holidays growing up. I believe the park in the picture is the cemetery where my grandparents are both buried. And the painting on the right is a broken down old pickup. Boats and old cars/trucks were often subjects of my Dad's paintings.

I do think the spacing is off and would like to move them a bit closer together... someday! Until then- done!

Monday, May 2, 2011

A little spray paint never hurt anyone...


A few weeks ago we inherited some furniture from a lovely family friend who was downsizing. The boys got a new dresser, their room is still in progress so I won't show you that one for now. But we also got 2 small pine cabinets. One for a side table in the family room and one fit just perfectly at the base of our stairs. It looks cute and I think it will be great for wrangling the overflow from the mudroom. You know, mitts and hats and sunglasses - all those little things that build up in the mudroom. And although it looked fine in pine (sorry I didn't get a picture of it) I had a can of turquoise spray paint hanging around. And I can't see a good can of spray paint go to waste just taking up space in the closet.

So.... it's turquoise now.
As are some star hooks that were originally intended for the boys room but have been in a cupboard for the last 2 years. Now the kids have a place for their backpacks that is just their height and equal distance from the backdoor and the kitchen - convenient on the way in from school and to pack lunches and collect on the way out the door.

This is the other side of the same landing.
So here's to an organized landing at the bottom of our stairs!

And now a little visual of the progress we have made in the last 2+ years.

Before
During
During
After

Monday, April 4, 2011

Reno News - countertop progress

So it's definitely not done but I have to celebrate progress as it comes. This week my lovely husband has been on a mission to install the counter and sink in the downstairs kitchenette. In order to make it look like we have done more than we actually have ;) I will show you the before too! This before shot is before we bought the house- therefore not our junk. Just thought I'd mention it.
BEFORE
DURING
AFTER-ISH
Ta-da! Ok, I am aware of the lack of knobs/pulls on the cupboards, the missing light fixture over the sink, lack of a kickplate, the unpainted windowsills and the hole where a bar fridge will soon be. But c'mon. You have to admit it's getting there!

There was a gap at the end so A made a wine rack to fill the space. Yes, built it from scratch. The hole where the wood and tool box is now will be a mini fridge, probably stainless.

And he also put in the sink. Cut the hole, installed the faucet and hooked up all the plumbing. He is good. I am so thankful for a handy husband. It make life so much cheaper in the long run!

Anyone want a glass of water from downstairs?

Tuesday, March 8, 2011

Reno news - in need of art

Many of the views in this room are coming along nicely. Ok, coming along if you ignore a few details like the still un-tiled fireplace surround. I think 2 salvaged windows would look good leaning on either side of the TV.
A few of the walls are looking a bit bare however.
I have some art in storage, under the stairs somewhere. A few are pictures that my dad painted and I really want to get those up.
Even that big wall by the table over there needs something...
Maybe that will be our task for next week.

Monday, March 7, 2011

A Bit More Basement Reno News

slightly rearranged basement mantel

The basement is still inching along toward completion. The bench seat was finished last week by my amazing handyman. We are deciding between leaving it as is or getting a foam cushion and covering it. He wants a cushion and I think it's fine without.
It is next to what will be the kitchenette. So it will be the perfect place for the kids crafting adventures with their supplies and the board games all stored underneath. I think we may have finally decided on countertops and a sink. Still need to finish those windowsills, pick a pendant light, buy a bar fridge...

The other side of the room looks pretty much the same as it did here when we first got the rugs. I still hope to change that ottoman cover and to get some kind of blinds.
This where I decided to put my new "library throw", a present from Jo.

Doesn't it look cozy?

Monday, February 21, 2011

The Desk

When we first put the desk downstairs I couldn't resist snapping a few pictures. It was a sunny evening (yay) so that helped a bit too. The colour is somewhere in between the detail shot below and the picture above, not orange but not yellow either.
Look at the carved pulls, lovely!
I have seen long rooms where they place a desk behind the couch so that's what we tried. I think it works well in this space. Plus it will be easier for the kids to climb on if the couch acts as a ramp. Just kidding, sort of. Actually if you look closely in the top picture you can see a hand peeking out from under the chair. That's K.

I am seeing us using that room a lot now that it is (mostly) done. Maybe working or sewing at the desk while the kids play? Here is my baby reading the corner next to the desk. Nevermind the hole behind her, we will make a door and get that access to under the stairs covered up sooner or later. Instead direct your attention to the cool tin bucket I used to pile up the story books. Or at the cutey pie reading, that works too.
OK, back to the desk. Great isn't it? Beautiful! And all those drawers... I'm just trying to decide how best to fill them!

Saturday, February 19, 2011

Reno News - yay for "new" furniture

I heart hand me downs. Bet my mom never thought she would hear that come out of my mouth when I was growing up!!! But I am coming more and more to appreciate older furniture that is well made. Our free bed from my mom and Skipper is the first example, check that post out here to see what I mean.

But the latest basement addition is a huge oak desk...

sneak peak
My mom and dad bought it at a garage sale a few years back and striped it and oiled it. I have admired it ever since! It is lovely and expansive. Maybe a bit too expansive- it fit easily in the minivan but can't say the same for the doorway... haha.

Don't feel bad, my handy man had it off then fixed all in a half an hour!


The other side of the room still looks like this...

But they say it has to get worse before it gets better!
So here is to 'better' hopefully coming later this week.
Stay tuned for more desk pictures soon.